Tuesday, September 30, 2014

White Bean Turkey Chili

Val's Version 
(Denver, CO)

"Beans beans, the musical fruit. The more you eat, the more you …"


Sorry. That was for my Dad. Although, I'm not sure why I did it for him since I'm fairly certain he's never read our blog. He actually probably doesn't even know that it exists. Anywho, every time I eat, look at or say "beans," that ridiculous song comes into  my head. If you don't know it, use your imagination. You'll hate me later.

My church does a chili cook-off each year and I've asked my husband to partake in it for the past couple of years. He's never indulged, so this year I thought it would be fun to compete. I'm an adrenaline junkie for competitions. I prefer something at stake, but friendly ones will suffice. But when I lose …
I. Hate. Losing.

Being that this was in Gods house, I tried to keep my smack talk to a minimum and cry in solitude. If you haven't figured it out by now, I lost. Well, I didn't finish last, but I wasn't in the top 3. Or in the top 10 for that matter. BUT, don't let that deter you from trying this recipe. White bean turkey chili is an acquired taste. Only the sophisticated and brilliant palate can learn to truly appreciate it. That's my way of rubbing my back and making myself feel better. I guess that's also my way of saying the judges weren't sophisticated or brilliant. (wink wink) Oops!

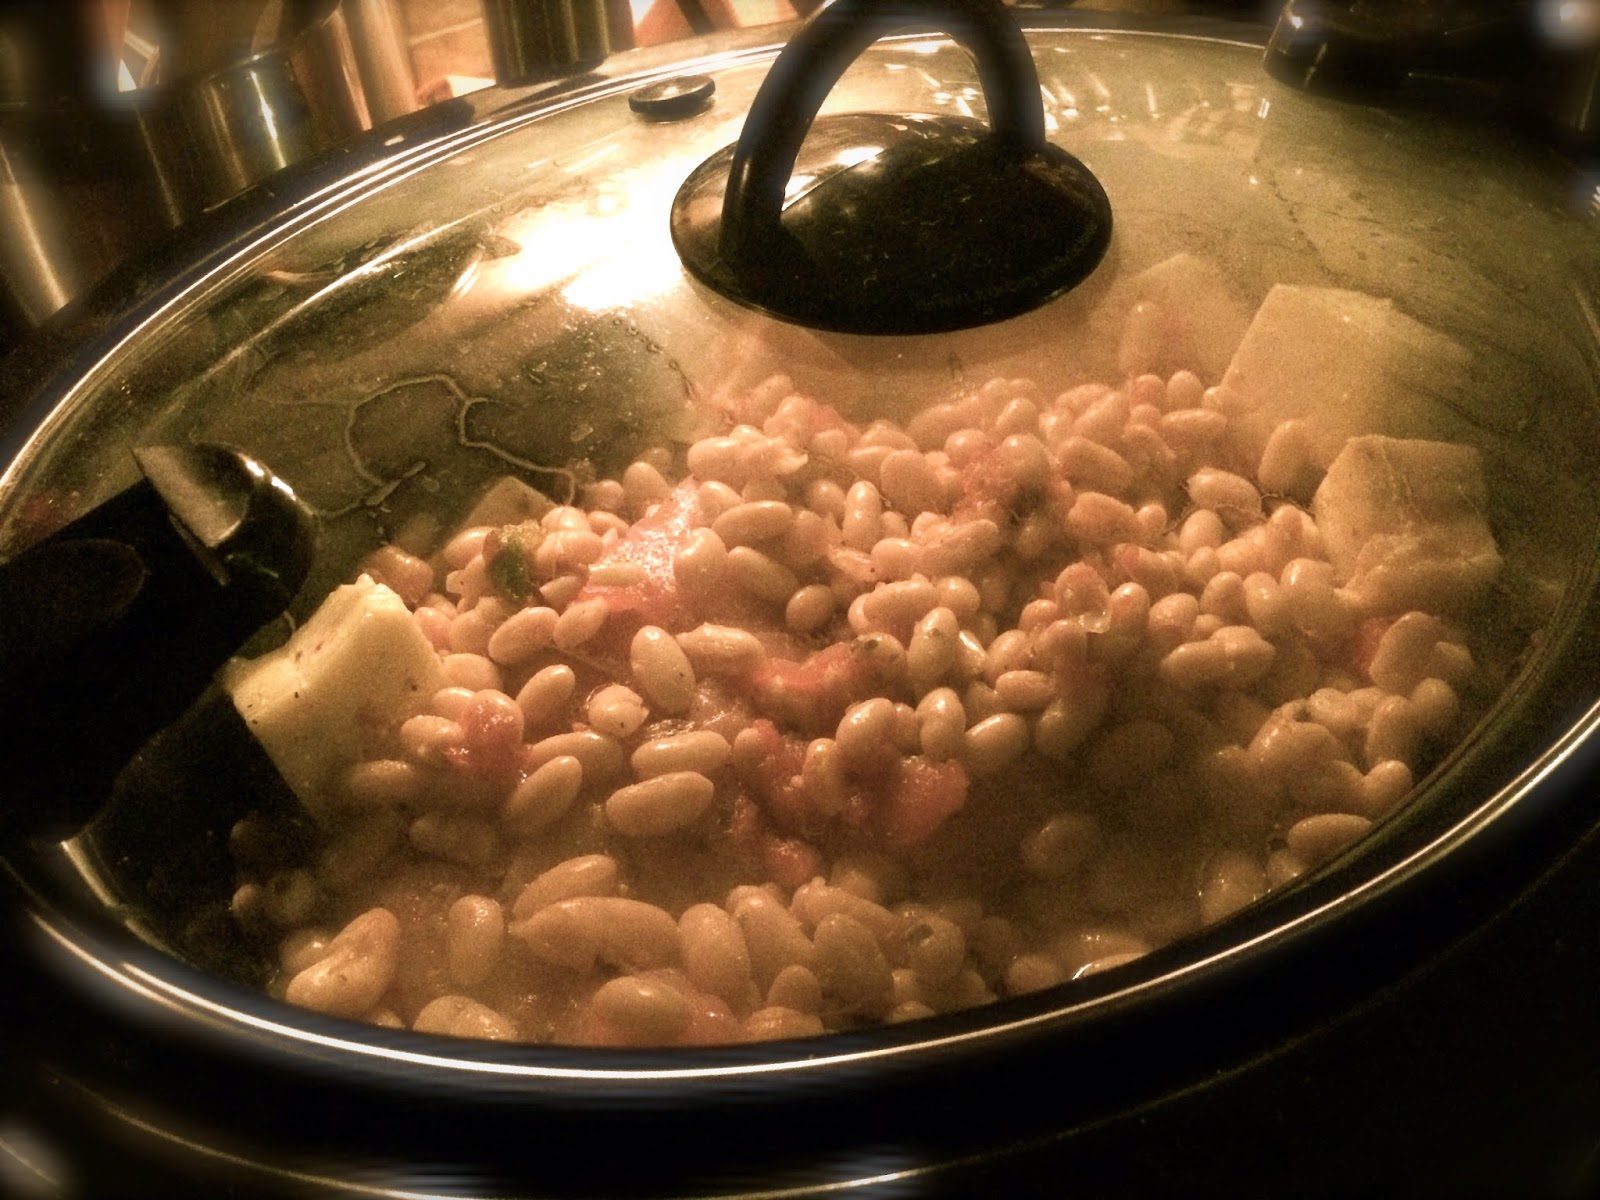
I had my alarm set for 3am to get this bad boy started. My competitive nature was not willing to risk cooking this on high to cut corners so I could sleep. That being said, the pictures came out a little dark. Good thing I like to talk (type) and will describe what's happening here.


I used a garlic salsa and then added more tomatoes. Chili is typically a red sauce, so this helps with the appearance for those that are stuck on a more traditional chili. 


Here they are. THE ingredient. And lots of them. Beans. Lots and lots of beans.


Whatever your protein choice is (I prefer turkey), make sure to season it before you tuck it into the bed of beans. Then, cube your cheese(s) and tuck around, under and over. Get it spread out all around the crockpot.


Wham! Let it do it's thing and go back to bed. Or be normal and start it mid-morning for a ready-to-eat meal around 6pm. All you gotta do after it cooks all day is shred your protein. And if you did it right, it'll be fork tender and just fall apart when you stir.


Here you will see the selection of chili's I tried at the cook-off. Mine is the very bottom one with the 2 others in a section. There was obviously a lot going on and with 29 chili's, it was hard to decide. So, I tried a little of a lot. I happened to taste 2 of the top 3 and will admit, they rocked! Like, rocked my taste buds with zest and spice. If that's the reaction you're going for, feel free to add some cayenne pepper or a hot salsa to this recipe. Can't hurt. Well, maybe later ...


White Bean Turkey Chili
Prep Time: 10 minutes
Cook Time: 
Total Time:

This recipe serves 6-8, but my pictures are set for a larger serving; about 20.

Ingredients:

4 cans white beans, drained and rinsed
2 turkey breasts, seasoned with salt and pepper
8 ounces Pepper jack cheese, cut into 2-inch cubes
2 cups salsa (any flavor, any heat)
cayenne or Tabasco for heat (optional)

Directions:

Combine the beans, cheese, and salsa in a crockpot. Nestle the turkey breasts into the mixture and cook on low 6-8 hours. Remove chicken breasts, shred with a fork, and return to crockpot. Stir to combine, and serve with desired garnishes. Avocado, sour cream, shredded cheese, Frito's and/or cilantro are excellent choices!

*** For the record, Jen COMPLETELY used a different recipe. Why? It's Jen. She does what she wants. Goes against the whole "same recipe 1400 miles apart" theme, but hey … whatever floats your fancy. Try 'em both!***

Jen's Version 
(Roswell, GA)


When Fall rolls around, it doesn't get much better than lazy Sunday's, cool weather and chili. Val picked one of my favorites this week, white chicken chili. Well, she picked turkey chili, but I like chicken chili. Every Halloween night, I serve chili. This way, we can trick or treat and then come home to a warm pot of chili. It's also a great Christmas Eve dish. I've done the classic chili alongside white chicken chili, to give options. I'm not even against chili in the summer. But I must say, when the temps dip into the 50's in Fall, it just feels right to make chili.


Rinse your beans. If you don't feel like it, smell the can when you open it. You will change your mind.


So you were supposed to put your chicken in first and then the beans, but my picture doesn't show much proof to that process. I promise there's chicken in there.


Val would be so proud of my organic, range free broth decision. It was an impulse buy really. I was like what they hey, let me be trendy.


This picture really jumped out at me. I love the different colors of the beans, onions and seasonings blended together.


Say hello to my mom's crock pot! 


So here's the yum part. After it cooks all day, and your chicken shreds apart, add some heavy cream. Real cream too. You can't add fat free cream. Cream = fat. If you take the fat out, you no longer have cream but instead are using some chemically infused liquid. So add some cream. If you're worried about the calories, skip this part and it will still taste good. Scoop into bowls and enjoy!


I paired my White Chicken Chili with a corn casserole. It didn't set right though, and the only person who ate it was my Dad. He's inclined to eat all things mushy. 


Oh and bonus, this is my husband. In honor of lazy football Sunday's, I introduce you to my husband's doppleganger, Alex Smith.

Crock-pot Chicken Chili
(slightly adapted from Mel's Kitchen Cafe)

Serves 6

Ingredients:

4 chicken breasts or thighs (frozen or fresh)
1/2 onion, chopped
2 tsp minced garlic
3 cans pinto beans
5 cups chicken broth
1 can (4 oz) chopped green chilies (or two cans if you really like things spicy)
1 teaspoon salt
1 teaspoon ground cumin
1 teaspoon dried oregano
1/2 teaspoon pepper
1/4 teaspoon cayenne pepper
1 cup sour cream
1/2 cup whipping cream

Directions:

Rinse beans thoroughly and toss them in the crockpot. Add everything else except the sour cream and whipping cream. Stir a little bit and cook on low for 7-10 hours.

Shred the chicken a little bit with two forks (this should be super easy - the chicken will be falling apart by this point). Stir in the sour cream and then the cream. Let sit for another 15 minutes or so to warm through. Serve.

Wednesday, September 24, 2014

Cream Cheese Pumpkin Roll

Jen's Version
(Roswell, GA)

Fact: I only enjoy baking in the Fall and Winter. Fortunately, that's when all the best holidays are as well as 80% of our family birthday's and my anniversary. Did I say fortunately?

I attempted the Pumpkin Roll a few years back. Two things: what is a jelly roll? who owns a tea towel? This recipe must be speaking to my inner 75 year old. I did it though. I made a Pumpkin Roll and my husband was over the moon. So ever since, it's become a Fall tradition. I'll make it for Thanksgiving, for birthday's, for breakfast....it has become a Kenny staple. And fortunately, I make it so well, my Mom need not ever do it herself. Did I say fortunately again?


I cooked this at my mom and dad's so that I could share the fruits of my labor with the group, and look who had a jelly roll pan. I'm not calling my mom old or anything, but....


Hey readers! I got a new phone! Since I'm hip, I got the new iPhone 6. I must say, that is one clear picture of eggs. I feel like I could just reach down and grab em'. Oh and don't you just love the vibrant color pumpkin adds?!


Does everyone think of the Christmas Cookie song when baking? I can't remember it exactly, and might be the worst person at remembering lyrics, but I feel like it has something to do with putting them in the oven. Wait, maybe that's Patty Cake? What is a "patty cake"?


Beautiful, handmade cream cheese frosting. And worth noting, the only way my husband enjoys cream cheese.


This is the scary party, because you're dealing with this precious pastry that you don't want to crack. When done correctly, it is beautiful and delicious. When done incorrectly, it is still delicious.


Oh yeah, my mom did a shrimp boil that night and Steph and I were very excited!


Ideally, wait until it cools completely before adding the filling. In my life, I don't know what that means.


Um, yum!


Side note: Roswell, GA is my favorite place, especially in the Fall!

Cream Cheese Pumpkin Roll
Prep Time: 10 Minutes
Cook Time: 15 Minutes
Total Time: 2 Hours and 25 Minutes (1 hour for cooling and 1 more hour for chilling)


(my adaption is just more butter!)


Val's Version
(Denver, CO)

Happy Fall Y'all!

That's right. Fall is officially here which means it's the happiest I'll be all year ;) 

pumpkin spice
brisk air
colorful crunchy leaves
football
pumpkin pancakes
ghosts and goblins
cinnamon
hunt for October
the color orange
pumpkin carving
my anniversary
pie
pumpkin pie with whipped cream
any kind of pie
boots, leggings, scarves, and cardigans
crisp apples
biggest feast of the year
farmers markets
pumpkin anything
dates by the fire
garnet and gold
fuzzy slipper socks
birthday celebrations for my dad, brother in-law, grandma, youngest daughter, both nieces, little brother, cousin and a handful of friends
(aka most expensive time of the year)

Seriously. Who doesn't love fall??? If it's you, stop following me. We can't be friends. 

Pumpkin. Mmmmmm, pumpkin. I just love that word. I love the color of it. The smell of it. The taste of it. The diversity of it. The use of it when talking to my babies. My little pumpkins. Speaking of, this devilish pumpkin just got caught stealing more pumpkin pancakes from a plate that I clearly should have moved further back. 


Pumpkin is good on so many different levels. If me telling you it is isn't enough reason for you to believe me, then believe this: pumpkins are an antioxidant, an anti inflammatory AND it is a high fiber food. It not only helps improve health and maintain great skin, but it can prevent poor brain function and fight against disease. Like, this is the mecca of all super foods. 

Sorry - may be a tad passionate about this fabulous ingredient. That being said, it's the backbone of this next recipe. Jen has made this one for a couple of years and this was my first attempt. I typically run the kitchen down with pumpkin breads, muffins, pancakes, candles and creamers. So, when this came up to bat, I was stoked (and nervous I'd crumble it to pieces) to give it a shot.


I may have gotten a little carried away when pulling the spices out. I only used cinnamon and and pumpkin spice.


The recipe calls for a jelly roll pan. I did it with a half cookie sheet. Spray it prior to adding a layer of wax paper, then spray again.


Once you've mixed your ooey gooey goddess, spread it out onto the baking sheet. I topped with a little bit of brown sugar to give it that extra umpf.


While it baked for a good 15 minutes, I mixed up the cream cheese filling and had some very eager taste testers nearby. Trusted seal of approval. 


Not certain why I'm even including this picture, but this is the roll. When you pull the bread of out the oven, it's gonna be hot. So, use your oven mitts and carefully flip it onto your CLEAN towel that you have generously covered in powder sugar. I left the wax paper on and rolled it fairly tightly. And honestly, this scared the dickens out of me. I was certain it would crumble to pieces and turn into pumpkin breadcrumbs. Jen assured me that it would not. I tend to doubt her. 


After cooling on the counter for about an hour, I unrolled the beast and was taken aback by its form. It rolled out. Like, legit rolled out. Didn't fall apart. Didn't crumble. Didn't even crack. So awesome. 


Slowly remove the wax paper. 
Don't be shy and spread the cream cheese filling to every end and beyond. Beyond being your fingers so you can lick them clean.


Then roll her back up by carefully pulling the bread away from the towel. Isn't she pretty? The powder sugar stuck like glue, so I didn't really add anymore. Jen probably did.


Sent her into the fridge to chill until Jen texted me to see how it turned out. My husband was anxiously awaiting his serving and was very impressed. Kinda sorta wanted to marry me all over again. 


And if you had leftover pumpkin (which you should have - even if using the smallest can), you can make gluten free pumpkin pancakes :)

Cream Cheese Pumpkin Roll
Prep Time: 10 Minutes
Cook Time: 15 Minutes
Total Time: 2 Hours and 25 Minutes (1 hour for cooling and 1 more hour for chilling)

Ingredients:

Cake
1 cup sugar
3/4 cup flour
1 tsp salt
1 tsp baking soda
1 tsp cinnamon
1 tsp pumpkin spice
3 eggs
3/4 cup mashed pumpkin
1 T brown sugar

Filling
8 oz cream cheese, softened
3 T butter, melted
1 tsp vanilla
2 cups powder sugar, divided

Directions:

Preheat the oven to 350 degrees. Grease a 15 X 10-inch jelly roll pan (or small cookie sheet). Cut wax paper to fit the bottom of the pan and leave an inch overhang on each of the short ends of the pan. Lightly grease the wax paper and sides of the jelly roll pan.

Mix the sugar, flour, salt, soda, cinnamon, pumpkin spice, eggs and pumpkin in a large bowl. Once mixed, pour mixture over the waxed paper. Sprinkle the brown sugar on top of the mixture. Bake for 14-15 minutes until edges pull away from the sides of the pan and center is done.
Lay a large dishtowel on the counter top (it is best to use a dishtowel without any texture – a tea towel or similar towel works best). Spread a thick dusting (about 1 cup) of powdered sugar all over the towel. When the cake comes out of the oven, turn the pan upside down on the powdered sugar-laden towel so the wax paper is on the top. Starting at one of the short ends, roll the pumpkin cake up with the towel to cool. While the roll is cooling, mix the cream cheese, butter, vanilla, and powdered sugar together until it is light and creamy. Once the roll is cool, unroll. Gently peel off the wax paper, being careful not to tear the roll. With an offset spatula, carefully spread filling in an even layer over the cake. Roll it up without the towel and place in the refrigerator (covered with plastic wrap or wax paper) for about an hour before serving.

Friday, September 19, 2014

Chicken Breast Stuffed with Pimento Cheese

Val's Version
(Denver, CO)

Here we go again … cheese, cheese and more cheese. For those of you who are Vegan or Paleo buffs, you should probably look elsewhere for recipe ideas. There are some vices worth having and cheese gluttony is one of them. 

I am forever in debt to Jen and Tina for introducing me to the Pimento Cheese Dip with Jalapenos. It has an assigned seat on the top shelf in my fridge and is so diverse in use. I pull it out to munch on when I'm cooking, add it to the hostess tray for game day, spread it on croissants for breakfast … It's my best friend. My right hand. My weakness. My love handles.


I found this recipe on the Eating Well website, believe it or not. A serving only has 200 calories, 1 gram of Carbs and 26 grams of protein. Legit health.


You'll notice I used sliced cheese instead of a block of Gouda. Three things: faster, cheaper and can be used on sandwiches.


Stuffed anything is incredible. 


Note to self: after frying the chicken stove top and then you've transferred the skillet into the oven; use an oven mitt when removing from oven. 


I added the remaining cheese mixture to the top of our chicken breasts because I didn't want to waste it. And I'm selfish and wanted more cheese.


This pairs with any type of vegetable or starchy side of your choosing. But, to stay "health conscious," we did a spinach salad (with more cheese) and sauteed squash with cherry burst tomatoes. 

Chicken Breast Stuffed with Pimento Cheese
Prep Time: 10-15 Minutes
Cook Time: 20 Minutes
Total Time: 35-40 Minutes

Ingredients:

1/2 cup Gouda (we used sliced)
1T diced pimientos
1 tsp smoked paprika, divided
3-4 boneless chicken breasts
1 tsp garlic powder
1T fresh parsley, chopped
1/2 tsp salt, divided
1/2 tsp pepper, divided
1T EVOO

Directions:

Preheat oven to 400 degrees.

Combine Gouda, pimientos and 1/2 tsp paprika in small bowl. 

Cut a horizontal slit along the thin, long edge of each chicken breast, almost through to the other side. Open like a book. Sprinkle the breasts with 1/4 tsp garlic powder, salt and pepper. Divide the cheese mixture amongst chicken. Close the chicken over the filling and seal the edges. Sprinkle breasts with remaining paprika, salt, pepper, parsley and cheese mixture.

Heat oil in a large ovenproof skillet over medium-ugh heat. Add the chicken and cook until browned on one side, about 2 minutes. Flip over and transfer skillet to preheated oven. Bake until chicken is no longer pink in the center, about 15 minutes. Serve and enjoy!

Jen's Version
(Acworth, GA)

True story: Bobby Flay's burger restaurant does not have Pimento Cheese. Not sure I can trust the guy anymore...

Much like Val, I'm cheese obsessed. Since Chris and I didn't complete a food questionnaire before we married, I learned after our legal binding that he is in fact NOT cheese obsessed. This is tough on the marriage, but we make it work. 

I'm done with my random blabbing. This recipe made me excited! I never stuff chicken, mostly out of fear of the unknown. The concept thrills me, the actual process, not so much. It all went well too, until I got to the "pan frying" part. Some of my stuffing fell out and I do not want ANY of my cheese filled stuffing to come out. This will take practice, I understand. 


Who else watches a lot of cooking shows and pretends to be on one when cooking dinner by putting their ingredients in pre-measured ramekins? Nobody?


Ahh Gouda Cheese, shredded fresh off the block. The only way to enjoy shredded cheese. Unless you're feeling lazy and don't want to shred of the block, which I usually am. But off the block is better. I promise. 


I know mayo wasn't on the original "healthy" recipe, but then we would be lying about calling this pimento cheese, so yes, I added some mayo. Sue me. 


I either need a new camera or need to see a doctor about my shaking. This is supposed to be my beautiful pimento cheese stuffing. It really was beautiful. 


I did it! I split a chicken breast. Not as hard as I thought. Sealing it up, that's a different story. 


At this point, it was still rocking and rolling. It was about 30 seconds after this I felt discouraged. 


Don't you even worry though, I put the cheese that fell out right on top. No cheese left behind! This was divine. Almost as fancy as the paper plate I ate it off of. 


Chicken Breast Stuffed with Pimento Cheese
Prep Time: 10-15 Minutes
Cook Time: 20 Minutes
Total Time: 35-40 Minutes

Ingredients:

1/2 cup Gouda (we used sliced)
1T diced pimientos
1 tsp smoked paprika, divided
1 T Mayo
3-4 boneless chicken breasts
1 tsp garlic powder
1T fresh parsley, chopped (I used dry seasoning)
1/2 tsp salt, divided
1/2 tsp pepper, divided
1T EVOO

Directions:

Preheat oven to 400 degrees.

Combine Gouda, pimentos, mayo and 1/2 tsp paprika in small bowl. 

Cut a horizontal slit along the thin, long edge of each chicken breast, almost through to the other side. Open like a book. Sprinkle the breasts with 1/4 tsp garlic powder, salt and pepper. Divide the cheese mixture amongst chicken. Close the chicken over the filling and seal the edges (as realistically as possible, because these guys don't close when you have heaping amounts of cheese inside). Sprinkle breasts with remaining paprika, salt, pepper, parsley and cheese mixture.

Heat oil in a large ovenproof skillet over medium-ugh heat. Add the chicken and cook until browned on one side, about 2 minutes. Flip over and transfer skillet to preheated oven. Bake until chicken is no longer pink in the center, about 15 minutes. Serve and enjoy!