Thursday, January 23, 2014

Creme Brule French Toast

Jen's Version
(Acworth, GA)

Breakfast for dinner. My husband's favorite dinner. I'm not a huge "breakfast" fan BUT I am a fan of it being completely appropriate to have beer with breakfast.

I started thinking about Valentine's day this year and what special thing I was gonna make. My husband and I prefer to eat in for many reasons. We splurge a little bit and do steaks or lobsters, so this year I wanted to find an amazing dessert we both would enjoy. I started looking into Creme Brulee since we both love it but have no clue how to make it. I went to my trusted source, Pinterest. First search landed on Creme Brulee French Toast. I immediately sent the link to Val and we had inspiration for our weekly dinner.

The Pinterest recipe linked to an original recipe, which gave us a few different ideas. I personally wanted to try the Challah bread version. 1. I've never tried it. 2. I really like saying Chhhhhaaaalah.


Our family is a really big fan of bread. 


And look how gorgeous Challah bread is...


This recipe is a pretty basic french toast recipe. Lots of eggs, cream, milk, vanilla, etc. I chose to do egg yolks so it would be more like a custard.


You pour the mixture over the Challah bread and let soak overnight. Since we did this for dinner, I soaked over-day. I'm, as you know, a fan of any meal I can prep and leave. 


Oh I forgot about this picture - look at my fun egg white separator. For some reason, I really enjoyed doing this.


After it sits all day, you bake for an hour. Easy, peasey. I baked it in a larger pan with water so it would set like a custard. I'm not sure I noticed it do that or not. It will be interesting to see what happens to my actual Creme Brulee. 

We also tried to "toast" the top. It really just burned the quadrant we tested. Turned out I missed the crucial step of adding sugar...


Um, yummmmmmmmmm...


Val's Version 
(Denver, CO)

I mean honestly … who doesn't just love breakfast for dinner? Our family tends to indulge in some sort of breakfast dish for supper every other week. It's just so easy. And when I'm not feeling up to trying to pull a recipe out of a hat with what we currently have stocked in the pantry or fridge, this is the route I take. Jen came up with an extra special dish this week. Kinda seemed like it should be a dessert, but once I made it and dove in, I really see how this is just a fancy version of French Toast. It came out quite tasty and was just as good the following morning ;)

Lucas (my 21 month old son) is constantly wanting to help me in the kitchen. It does not matter if it's dishes, cooking or cleaning. He tends to always be right on my heels, mimicking whatever I'm doing. So, to make him less of a tripping hazard, I usually plop him on top of the counter and assist when the time is right. Not just for his safety, but also for the life of our food being prepared. 

Get your ingredients pulled out and melt your butter. 


Mix together all of the specified ingredients for the custard and then slicing your bread into cubes. If you'd prefer a French bread instead of Challah, it still goes through the same process.


Place cubes into a greased baking dish and toss in cinnamon and sugar. And if you have a wild hair, add a secret ingredient. I happen to LOVE blueberries and thought a little fruit would go quite swell with this dish.


Then toss with the custard mixture and press down so the bread can soak. If you have time, refrigerate - I let mine sit for 3 hours.


At this point, you have some down time. When I could've been cleaning my house or napping while the babies slept, I decided to work on my side dish; SAUSAGE BALLS!!!! These are an easy to make treat that don't last long in anyones home. We've even done these as an appetizer for football game. 


Mix together 1lb of breakfast sausage with a cup of shredded cheese and 2 cups of Bisquick. Any type of sausage or cheese will do. Roll into quarter size balls and place onto a greased cookie sheet. Preheat oven to 350* and cook for about 20-25 minutes or until sizzling golden brown. Let them cool for 5 minutes and viola! Super easy and a great pairing for any breakfast dish or occasion.


After your casserole has had time to soak, you pop it into a preheated oven at 325* and bake for 40-50 minutes. Mine was closer to an hour, but we are cooking in a much higher altitude so things tend to take a little longer to set. Once it's browned and no longer has a jiggling (well known cooking term) center, sprinkle the top with remaining sugar and put into broiler for just a couple minutes - until top coating has caramelized. DO NOT WALK AWAY! I made the mistake of getting our travel dishes ready since we were going to be eating at Girl Scouts and took my eye off of it for too long. It may have gotten a little too toasty. But, it still tasted fabulous and was another family hit :)


Adapted recipe from Homemade By Holeman

Creme Brule French Toast
Prep Time: 5 minutes
Cook Time: 40-50 minutes
Total Time: 45-55 minutes

Ingredients: 

1 large loaf of Challah bread8 large eggs1 pack of fresh blueberries2 1/4 cups milk1 cup plus 4-5 T sugar1/4 tsp salt2 T vanilla extract1/4 cup grapefruit juice2 tsp cinnamon2 T unsalted butter

Instructions:

Combine eggs, milk, 1 cup sugar, salt, 1 tsp cinnamon, vanilla, grapefruit juice, and 2 T melted butter in a large bowl.  Whisk together until well incorporated.  Coat a 9x13 baking pan with cooking spray.  Slice bread into 1/2" thick slices and then cut slices into cubes.  Combine remaining cinnamon and 1 T sugar.  Add bread cubes to pan and toss with cinnamon sugar mixture.  Top bread crumbs with fresh blueberries. Pour custard mixture over bread cubes and blueberries, pressing cubes down with a spoon to thoroughly soak bread.  Cover with foil and refrigerate at least one hour or overnight (I refrigerated for 3 hours).  Preheat the oven to 325 degrees.  Bake approximately 40-50 minutes until golden brown and set.  Remove from the oven and sprinkle remaining 3-4 T of sugar over the top of the casserole in an even, heavy layer.  Set broiler on high and return to oven or use a kitchen torch to caramelize the sugar.  The sugar will turn brown and liquefy and then harden as it cools.  Serve warm with maple syrup and powdered sugar, if desired.

Tuesday, January 21, 2014

Unexpected Foods You Can Cook In A Waffle Iron

Val's Version 
(Denver, CO)

Thinking outside of the box. My philosophy. Thanks to my brother-in-law, Dave, I was given a waffle iron and have been indulging in all types of waffle recipes. I can honestly say, none of them were as creative as this next piece. Jen and I thought it would be neat to spice it up a bit and use the waffle iron for a more savory dish … or 2. 

I decided to do a Waffle Pizza! We created a few different pizzas with a variation of toppings. I must say, all 4 waffle calzone pizza pockets came out great (so I heard)! The first one created wasn't the prettiest. Had to learn to trim the outside of the crust with more of a precise cut as I made more. I also cooked mine last and the crust was rolled out a little too thin, therefore the guts didn't quite stay in place, but that's a lesson learned. 


Instead of going the overly domesticated route and preparing the dough from scratch, I used Pillsbury Thin Crust pizza dough. I rolled it out and cut in half to make 2 separate pizzas. I didn't really buy anything special for the toppings and used what we had; pizza sauce, pepperoni, pineapple, peppers, mozzarella cheese, and italian spices. After placing half of the strip of dough onto the iron, I layered it with sauce, cheese and additional toppings. 


After I created our fillings, I folded the remaining half of the dough over the toppings. Closed the iron and cooked for about 3-5 minutes, depending on how thick the dough was rolled out. While the waffle pizza was turning into a belly satisfying treat, I trimmed the edges with the pizza cutter. 


After checking the waffle to make sure it was cooked through, I removed it from the iron with a spatula and cut in quarters.


The midgets really enjoyed this new version of an italian classic!


Hats off to Mo Momma and her creativity with making a Waffle Pizza!

Jen's Version
(Acworth, GA)


You know when you're getting married and you go to the store to register for gifts? You know how they give you a scanner/gun thingy that you use to scan everything you like/want/dream of/have no use for and add to your registry? Yeah, that's how I got my waffle maker. "Oh I can make waffles!" I exclaimed as I scanned the waffle maker. Turned out, one of our wonderful wedding guests bought it for us. I think a few months after we were married, I attempted waffles. I have a faint memory of burnt waffles and an impossibly dirty waffle maker. It remained dormant for a few years after that. That was until probably 6 months ago. I was watching Food Network and saw a clip highlighting Gladys Knight's Chicken and Waffle restaurant in Atlanta. Didn't take much to get me to bust out that old waffle maker and try again. This time, the waffles came out wonderful! Lightly crisped yet fluffy. I guess me and the waffle maker just had some growing up to do.  That or I just needed to spray some Pam on it...


So Val sent me a link for "Unexpected Foods you can Cook in a Waffle Iron". I looked through all of them and quite honestly wanted to try them all. I was leaning towards the waffle hamburgers, but I already had tortillas and a soft spot for Mexican food so I went with the Quesadillas. I used chicken sausage with red and green peppers for the meat. I've been on a chicken sausage kick. Fine, I'll be honest. Chicken sausage was on sale...


Mmh, beer. This has nothing to do with the recipe...


After seeing what Val had to do, I feel like I cheated or something. Literally, I just threw sausage and cheese onto a tortilla and topped with a second tortilla and closed the lid for 4 minutes. 


Voila! You have a Quesadilla! I must say, although not exactly revolutionary, I wouldn't have thought to cook a Quesadilla in the waffle maker. Makes this 5 year old beauty just that more useful!


What's the cereal tagline about mom's liking it and kid's approving? Do I have it backwards? Whatever it is - that's what we have here. 


Shout out to Mo Momma!

Thursday, January 16, 2014

Easy Crockpot Pork Carnitas


Jen's Version
(Acworth, GA)

The Cast of Characters


I have a hard time saying no to any recipe that includes "a bottle of beer". I also have a hard time saying no to a dinner cooked in a crock pot. I also have a hard time saying no to food...


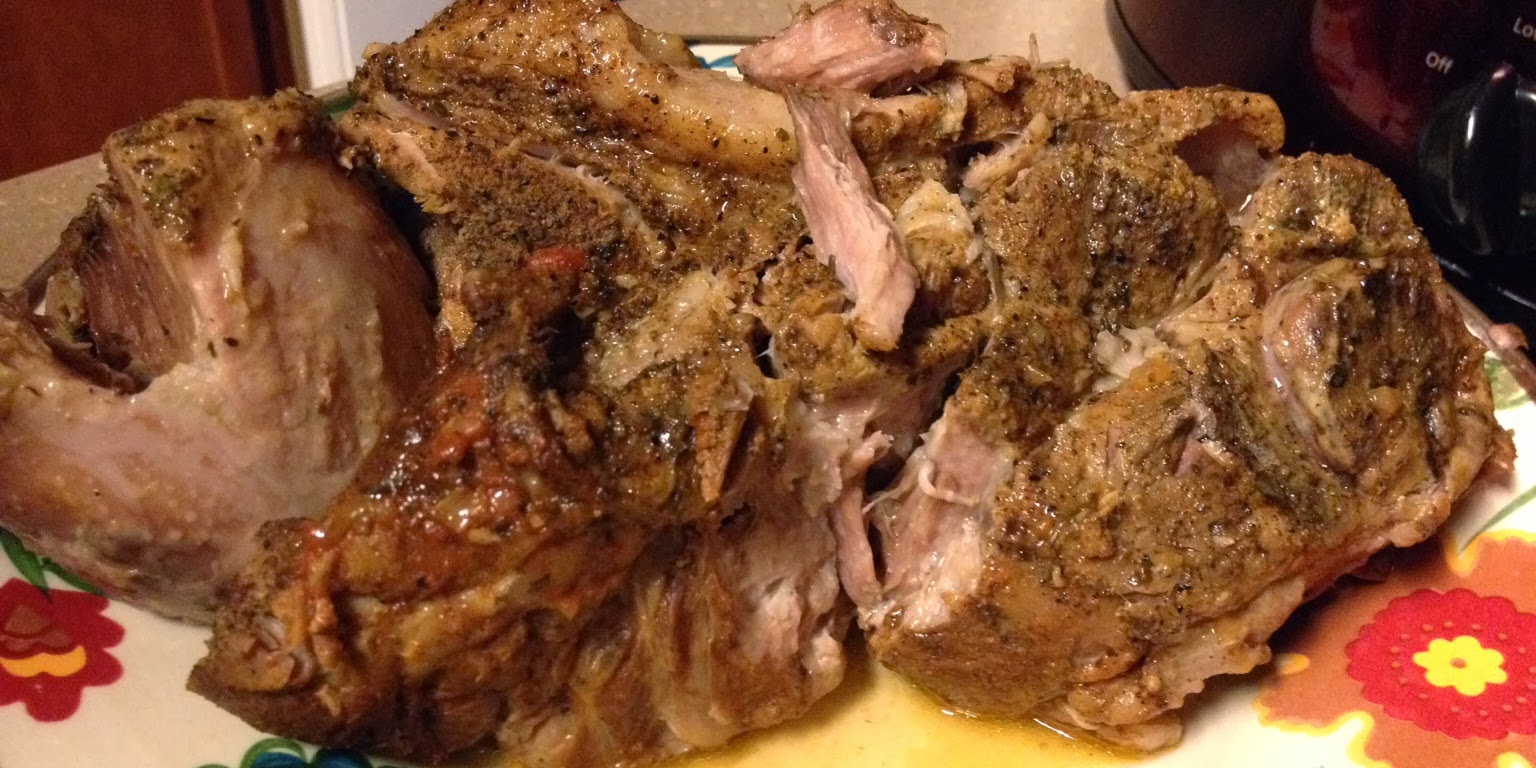
So I took this beautiful hunk of pork butt and threw it in a crock pot. Then I topped it with salt, pepper, garlic, cayenne, cinnamon, oregano, cumin and chili powder. I am never comfortable with touching raw meat. I totally get why you do it, but I just don't like it. I did it though. I manned up and rubbed the seasoning into the meat. Then I poured beer and orange juice on it like a moron, and all the seasonings dripped down the side. So lucky me got to handle the raw pork twice.


I entrusted my sous chef (appropriately dressed in Belle princess gear) to squeeze the limes into the mix. I learned something too - not all limes are created equal. There are limes that don't have lime juice inside of them. 


Lastly, I topped it with the salsa. I would have never thought putting salsa in a crock pot dish would turn out good. I admire those who take a chance on meals so that I can enjoy the goodness! So now we're at my most favorite part of the meal. You enjoy your life for 8 hours while soaking in the growing aroma of pork carnitas. You don't have to chop or sautee. You just wait. And 8 hours later, tender, flavorful pork awaits you.


I paired this with a tamale pie for my husband, but I also threw it in a soft taco shell for the girls and topped with cheese and they were happy campers. I love meal versatility. I also love a happy, fed family.

Val's Version
(Denver, CO)

I'm always a little gun-shy when cooking with pork. It's a very temperamental meat and I like it cooked just right! Crockpot recipes seem to always have a way with making meats extra juicy and tender, so I wasn't as skeptical with taking on this recipe challenge. 


This particular recipe had so much flavor built into it from all the spices that I didn't alter it much. Instead of cayenne pepper I used red pepper flakes. I also added some onion and garlic powder that I rubbed into the pork shoulder. 


Being that I started later in the day, I adjusted the time and did 2 hours on high and 4 hours on low. There was also no need for me to cook in the broiler after the 6 hours in the crockpot. It came out fork tender, juicy and finger lickin' good!


We paired our Pork Carnitas with some Fried Egg and Zucchini Quinoa! A healthier version of Fried Rice and a little more flavorful. 


While the quinoa was simmering, I fried up the zucchini and eggs. 


Tossed it all together and it made a very light and nutritious side dish.


With a family of 5, 4 of which are culinary connoisseurs, you have all types of pallets and preferences. That being said, I was able to use the pork in a few different ways; lettuce wraps for Momma bear, burritos for Dad and Bug and pork al a mode for the little man!


When asked if there was anything I could do different or any suggestions, Mike responded with "Don't put it away yet!" The next night, we changed it up a bit and used the leftovers in a 
Broccoli and Cheese Orzo bowl :)


We found this recipe through Pinterest (where we find most of our inspiration) by Pinch of Yum

Easy Crockpot Pork Carnitas
Prep Time: 10 minutes  
Cook Time: 8 hours  
Total Time: 8 hours and 10 minutes

INGREDIENTS
  • 4-5 lbs. pork shoulder
  • 5 cloves garlic
  • 1 tablespoon salt
  • 1 teaspoon cumin
  • 1 teaspoon chili powder
  • 1 teaspoon black pepper
  • 1 teaspoon oregano
  • 1 teaspoon garlic powder
  • 1 teaspoon onion powder
  • ¼ teaspoon cinnamon
  • ½ teaspoon red pepper flakes
  • 1 tablespoon chipotle hot sauce (optional)
  • juice of 2 limes
  • ½ cup orange juice
  • 12 ounces beer
  • ½ cup salsa (I like to use a less chunky one)

INSTRUCTIONS
  1. Place the pork shoulder in the slow cooker. Roughly chop the garlic and place in the slow cooker (I actually kind of rubbed it onto the meat to get as much garlic flavor as possible, but you could just toss it in, too).
  2. Sprinkle the meat with salt, cumin, chili powder, black pepper, oregano, cinnamon, and cayenne. Rub seasonings onto the pork.
  3. Add lime juice, orange juice, beer, and salsa. Cover and cook on low for 8 hours.
  4. Shred meat with two forks directly in the slow cooker (or take out, shred, and replace in sauce). It should fall apart easily.
  5. Preheat broiler. Line a baking sheet with aluminum foil. Place the shredded meat on the cooking sheet and pour a few spoonfuls of sauce over the top. Broil for 5-10 minutes or until you get browned edges on the pork.
  6. Serve on tortillas with fresh cilantro, avocado, and lime juice.